The benefits of an IDE - what is Visual Studio .NET?
You can write code using notepad so why do you need something complicated like Visual Studio.NET? Visual Studio .NET is an IDE. IDEs offer you all sorts of extra tools that make it easier for you to create your program. You can create user interfaces with forms and buttons etc. You can organise your files. You can also debug your code to find errors. You might not appreciate how much this helps yet, but you will as we progress.
It’s worth noting that Visual studio is the IDE that professional software developers use. It used to be very expensive but now it is free for you!
Visual Studio is already installed on or class laptops, to start press the Windows key and search for Visual Studio 2019.
If you want to install Visual Studio on your home laptop read the instructions at the bottom of this page.
Features of an IDE |
Useful Shortcuts |

|
F5 - Run
Shift F5 - Stop Ctrl+L - Delete a line of code. CTRL+MO - Collapse All CTRL+MM - Expand Current |
The Basics
Visual Studio .NET - The Layout
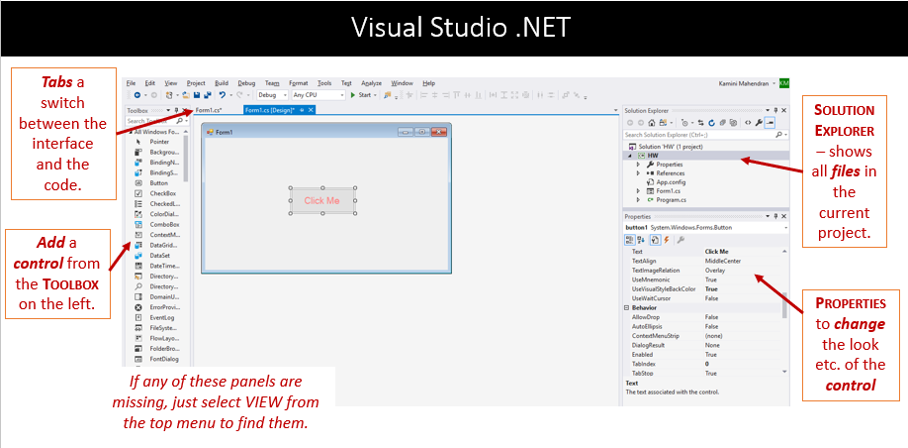
In Visual Studio the form is your blank canvas. You drag controls onto the form and then code the actions which will happen when the user interacts with control. This is called event driven programming. Check the image below to find out about the main panels in Visual Studio.
A couple of hints:
1. As it says above, if you can not see the Toolbox from the menu select VIEW then Toolbox.
2. You must click on the form before you can drag in a control. Controls ( e.g. a button) wont show otherwise.
3. Form not showing? In Solution Explorer ( top right panel) select the form ( probably called Form1.cs). You'll see a little picture beside it. Then right-click and select view designer.
4. Want to see your code: Do the same as step 3 above, but select view code rather than designer.
The Hello World program
Programmers usually start by creating a Hello World program. This is just a simple program to check how the IDE works. Here are the main steps. There is also a couple of videos below demonstrating the steps if you prefer to watch those!
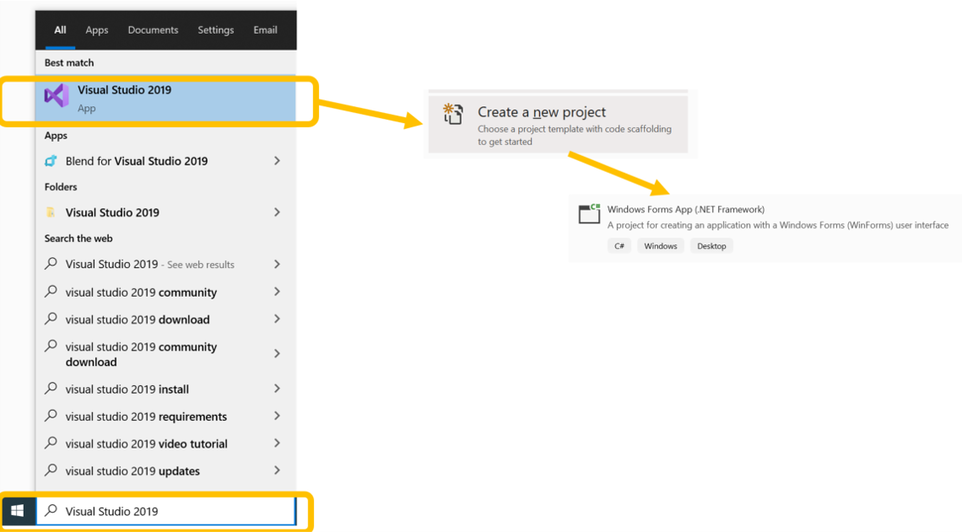
1. Press the Windows key and search for Visual Studio 2019.
2. Select Create New Project.
3. Select Windows Form App ( .Net Framework) for the programming language C#. Be careful as some options look similar!
2. Select Create New Project.
3. Select Windows Form App ( .Net Framework) for the programming language C#. Be careful as some options look similar!
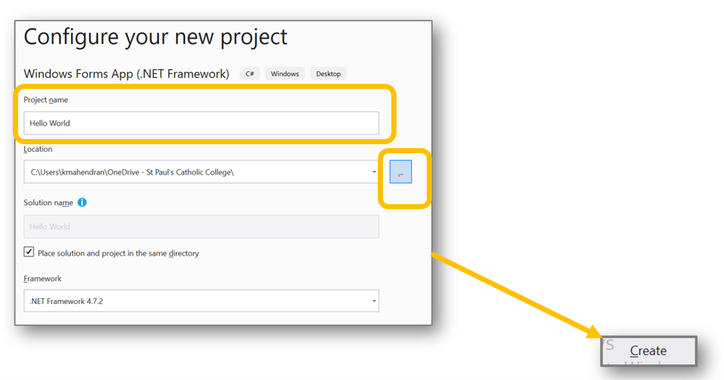
4. Type in a name for the project.
5. Then press the three dots to choose your OneDrive folder.
6. Press CREATE.
5. Then press the three dots to choose your OneDrive folder.
6. Press CREATE.
|
7. You will see your project which with one form in the middle ( see above). From the Toolbox on the left, drag a button onto the form ( If you can't see the Toolbox you will find it under the View menu.

|
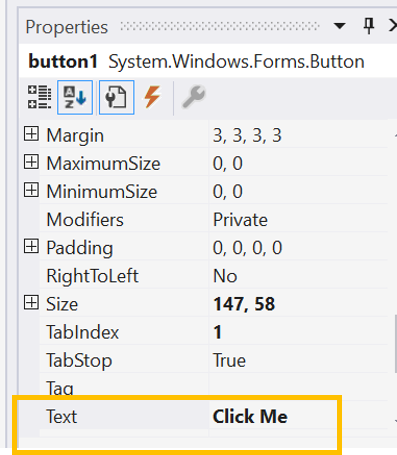
8. Click on the button. Then go to Properties. Change the Text property to "Click me." If you can't see properties, check the View menu.
|
|
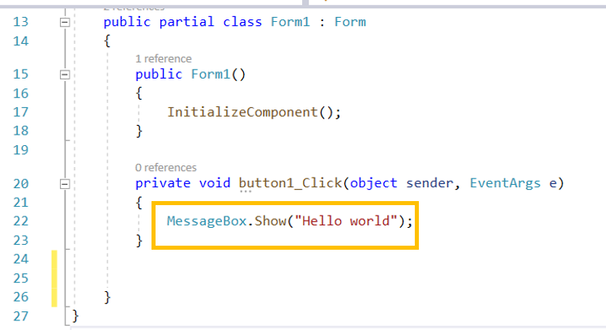
9. Double click to add actions ( code) to the button. All action related code must be typed inside a function. Type MessageBox.Show("Hello World"); between the curly braces for the button1.
|
|
|
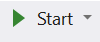
9. Now run your program by pressing the Start button ( or F5).
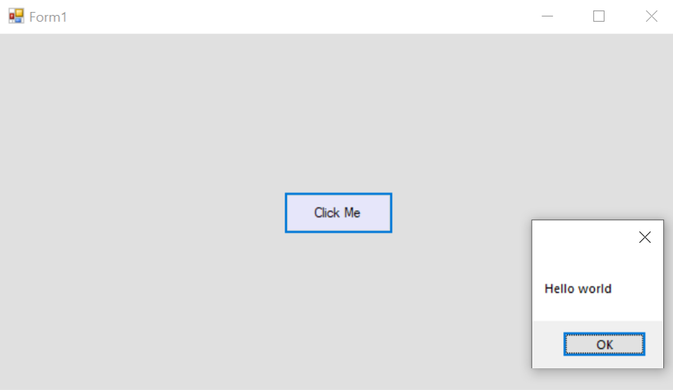
When you click the button, you will see a message box with the text "Hello World."
|
|
That's it! You have created your first C# program in Visual Studio .NET :-)
Hello World - Step by Step Video.
The videos below show the same steps to create your first hello world program.
|
Step 1: Add a button.
|
Step 2: Add code to your button
|
|
|
|
Ready for a challenge?
|
Try adding more buttons by dragging them from the toolbox. You can also copy and paste your existing button. Then double click the buttons to add different messages behind each button.
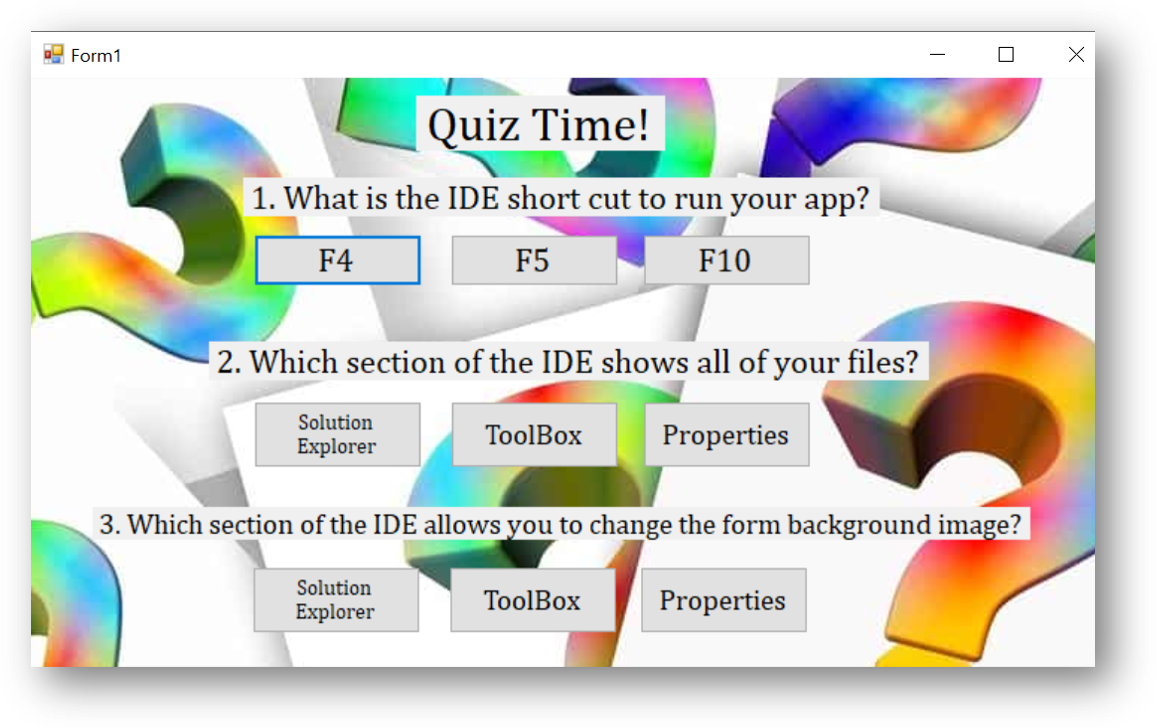
Try this: Make a simple multiple choice quiz by typing questions into a label control. Then have three different answers behind each button ( see right). |
|
Here are some other controls to try out.
Other simple controls to try:
Slightly trickier:
Feeling brave?
Other simple controls to try:
- Label - to just show some text.
- Checkbox - the user can tick on or off.
- TextBox - the user can type in text.
- RadioButton - on or off only.
Slightly trickier:
- ListBox
- ComboBox
- NumericUpDown
- PictureBox
Feeling brave?
- MonthCalendar
- DateTimePicker
- CheckedListBox
Extra Tips
Working with forms
Form_load
|
Form load is a good place to put code which you want to run as the form loads ;-)
Create the form load function by double clicking on your actual form. Check out my video here. |
|
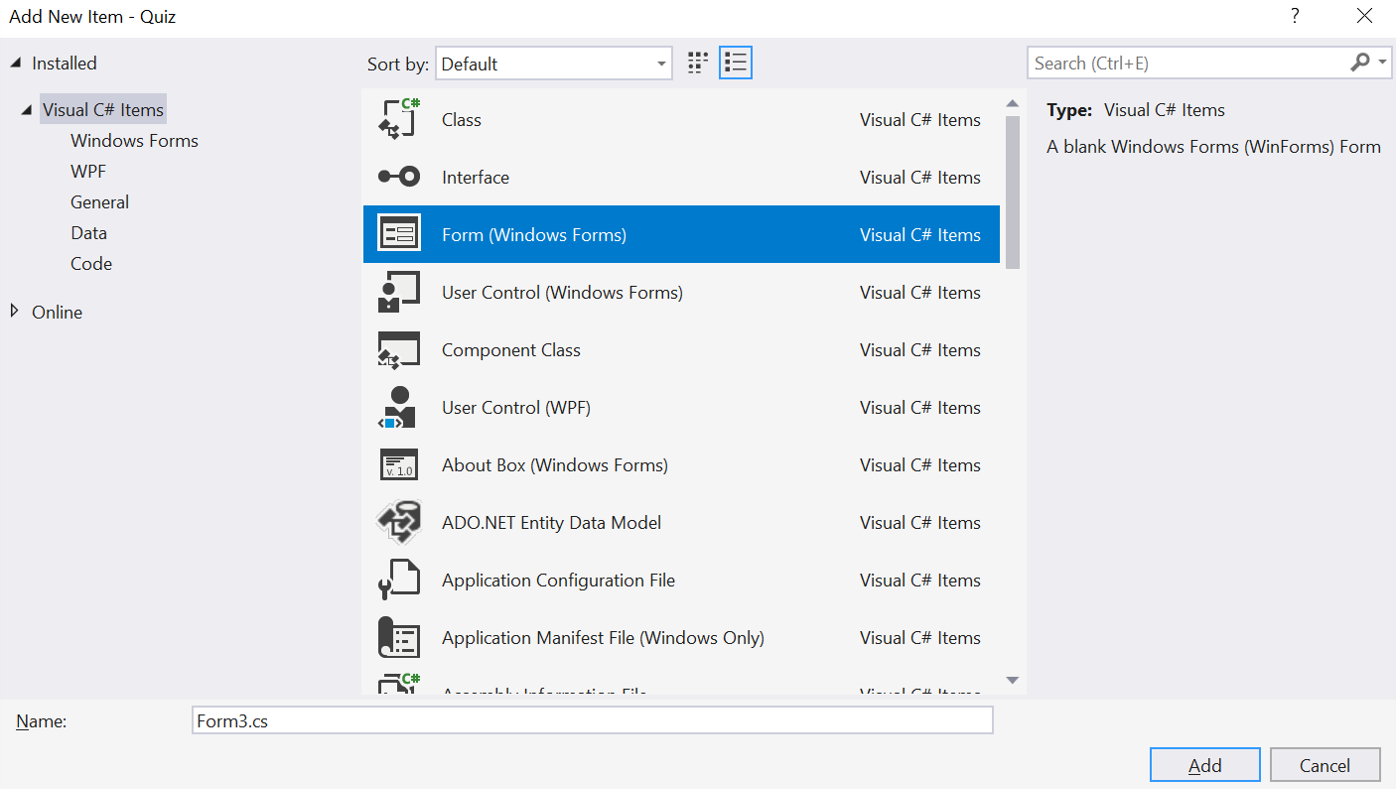
Adding extra forms
You can add another form to your app by selecting from the menu project | Add Windows Form.
To create and show an instance of the form type the code:
Form2 myForm = new Form2( );
myForm.Show();
Note: it is not easy to transfer data between forms, you'll probably have to save it to a text file first.
Troubleshooting
My form just broke!
Most of us have done. Delete some code that we don't need and then our form wont work anymore! Here 's a short video to help you solve this problem. Before you attempt, close your entire project and BACK UP your entire folder ( make a copy of the folder).
Console Apps for Text Based Programs
Follow the slides below in order to create a basic console app:
Installation
Installing Visual Studio.NET
|
Visual Studio is already installed on or class laptops. Only read this if you want to install Visual Studio on your home laptop make sure you follow these instructions.
Step 1 : download the 2019 community version of this Visual Studio from the following website. https://visualstudio.microsoft.com/downloads/ Step 2: Select the . exe file which will appear at the bottom of your screen. Step 3: Click install, next etc until you get to the screen below. This will take some time as the install begins. Then select the .NET option ( look for the purple icon). |
|
