What is HTML?

|
HTML is the most basic coding used to make a web page. You just need a text editor like notepad to make a web page. If you right click on almost any web page you will see some HTML tags. They have a word between < and >.
|
|
Getting Organised
|
Create a new folderThere are two ways:
Move an Existing FolderUsing the short cuts is best:
To Cut:
|
The Main Tags to Set Up your Web Page
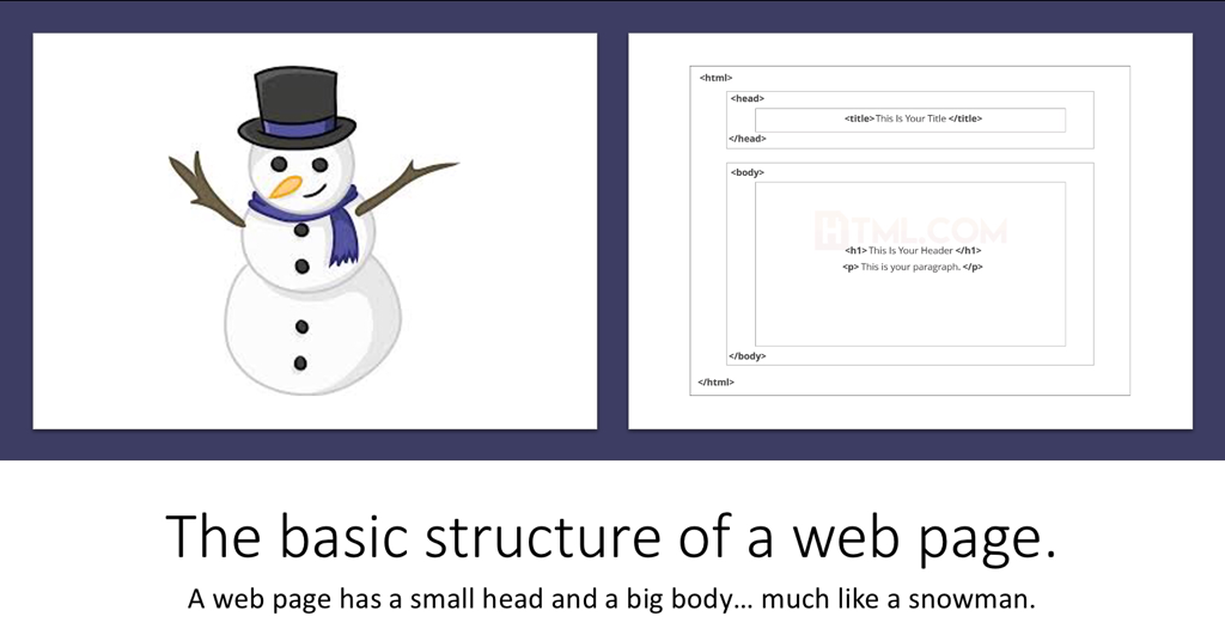
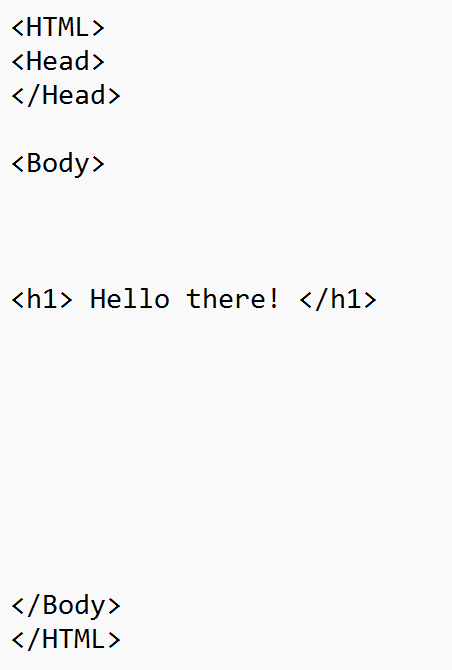
To,set up your web page you need three sets of structure tags ( see image below): HTML, head and body. The head section is not used often. The main code goes in the body section. So think snowman.. little head, big body!
Make Your Own Web Page! Getting Started..
|
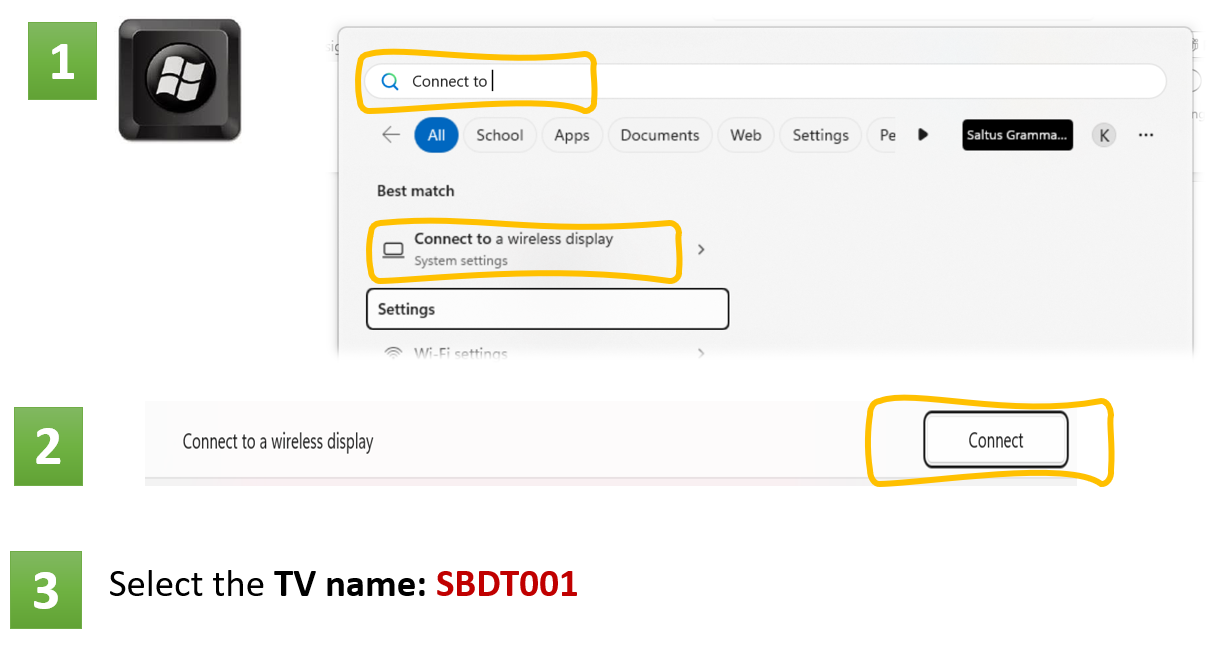
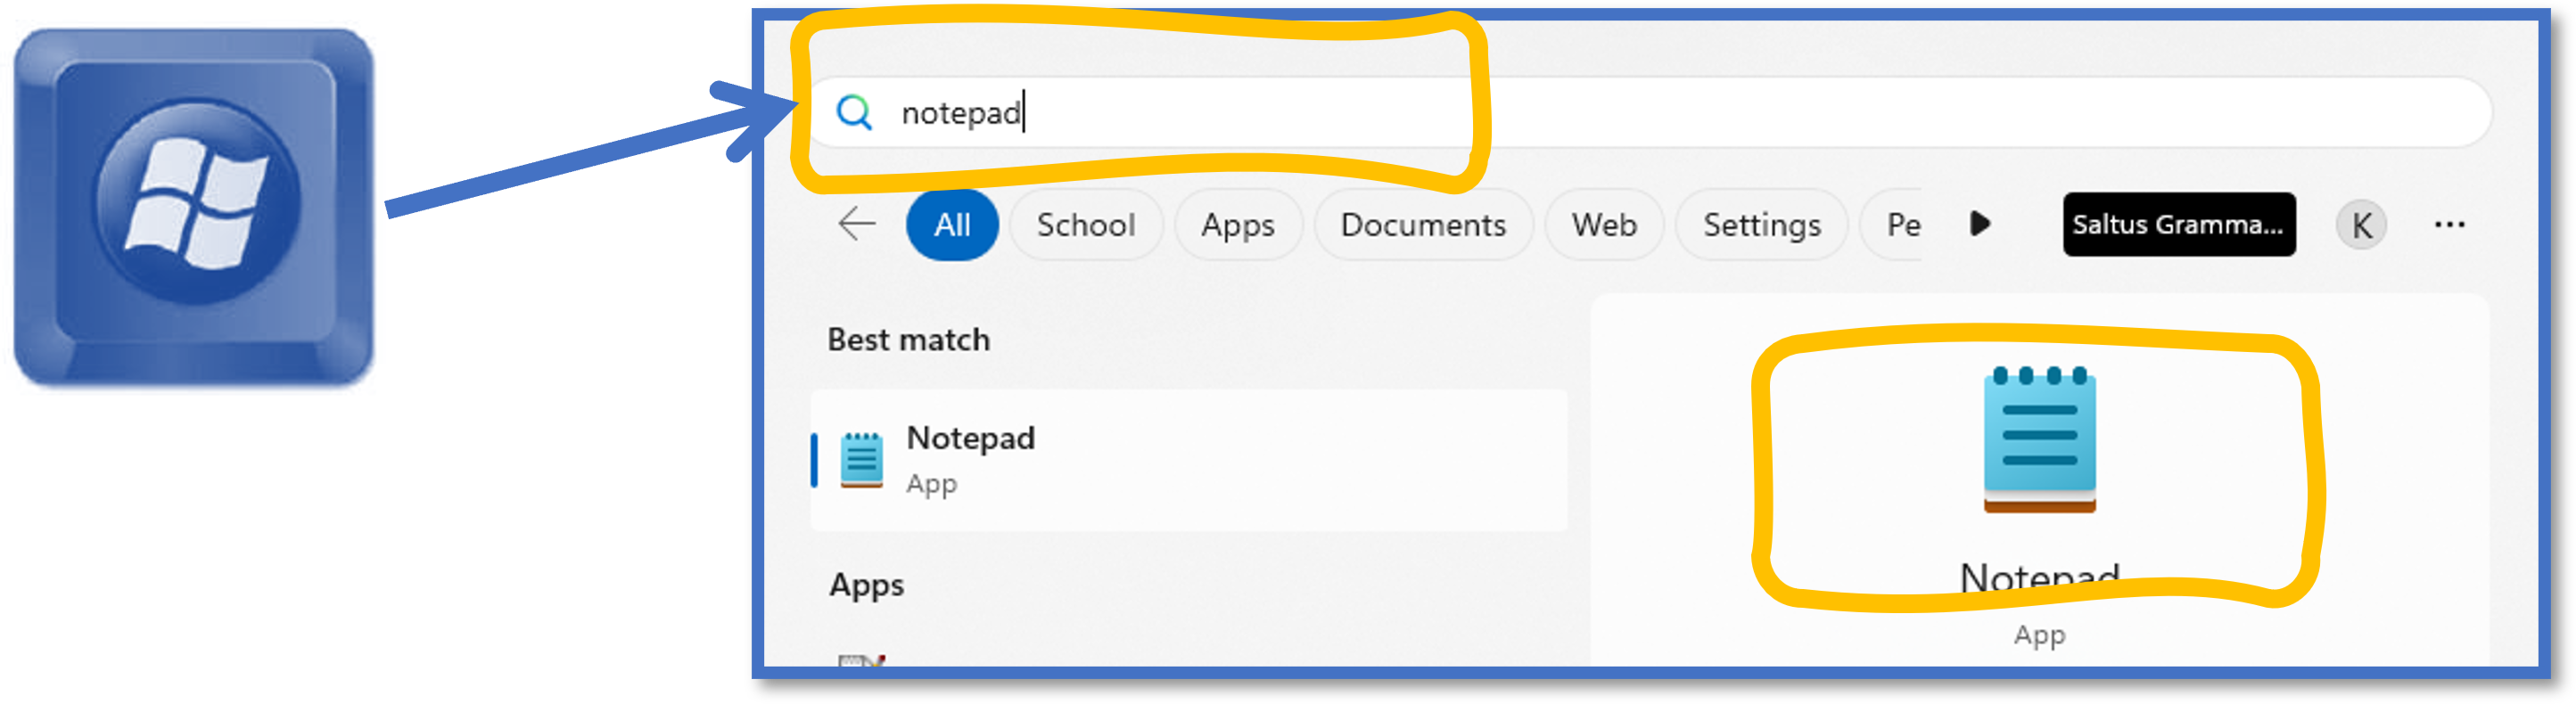
Use the Windows button, search for notepad and open it.
|
|
Type the main tags into your notepad file: HTML, Head and Body as shown here.
Careful when Saving!
Go to your Website folder. Save your file with a sensible name followed by .html. Change the file Type to All files.

Test your web page - open it!
|
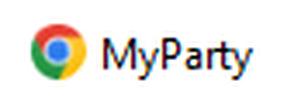
If you have saved your file correctly it will appear in your folder with a browser icon. Double click to open it. If you can't see a browser icon, follow the steps above to save your file again.
|
|
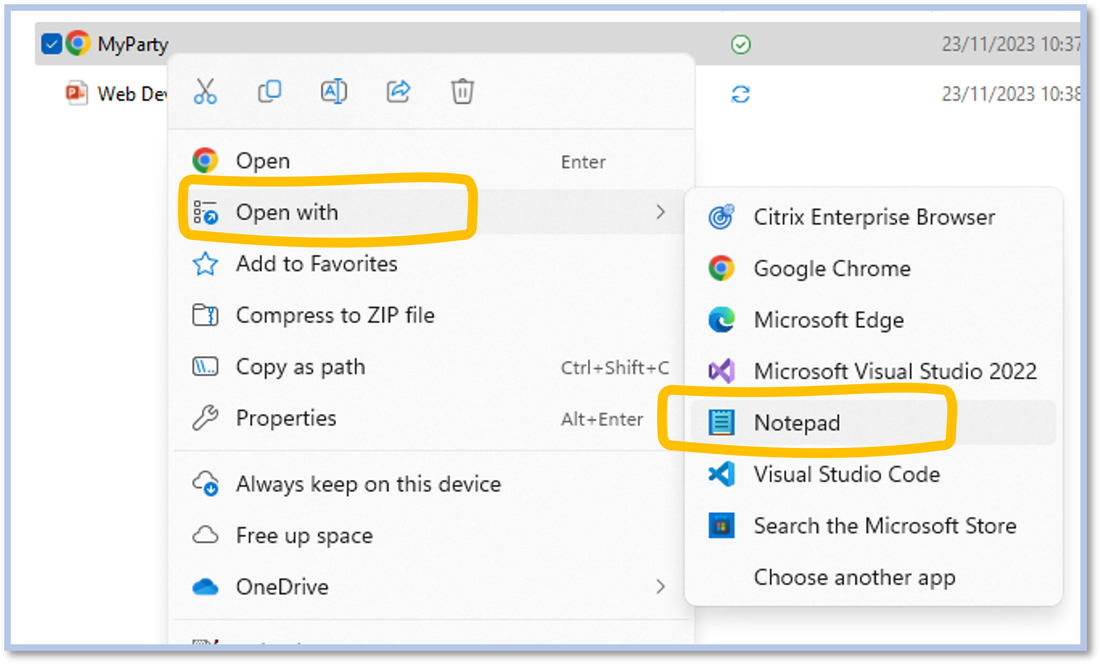
Keeping your web page open in the browser open it again in Notepad. Right click and select Open With, then Notepad.
You can now continue to make changes to your web page. Press Ctrl S to save the changes in Notepad. Then refresh in the browser. |
|
Adding Text to Your Web Page
Heading Tags - from largest to smallest<h1>This is the largest heading</h1>
<h2>This is a slightly smaller heading</h2> <h3>This is an even smaller heading</h3> <h4>This is an even smaller heading</h4> <h5>This is an even smaller heading</h5> <h6>This is the smallest heading</h6> |
Adding a paragraph<p>My first paragraph.</p>
<p>My second paragraph.</p> <p>My third paragraph.</p> |
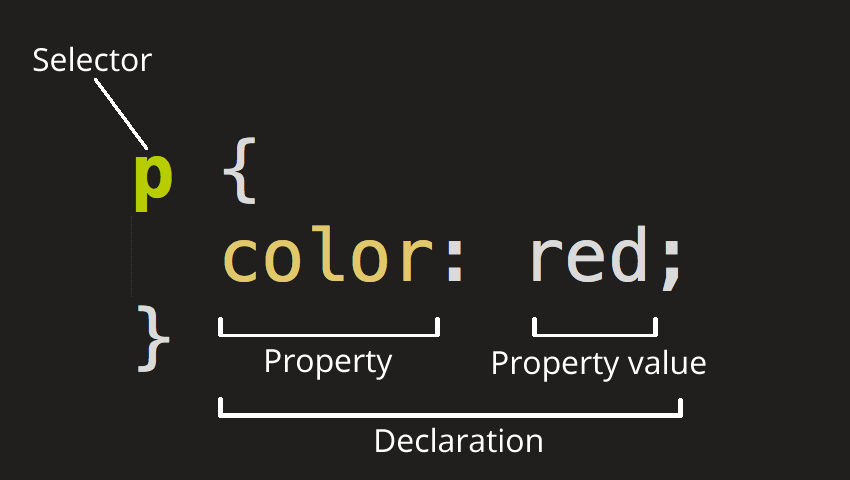
Change your font colour
You can add colour by using styles. Add the text style="color:Red;" to change your font to red ( or choose whichever colour you like)
<h1 style="color:Red;">This is the largest heading</h1>
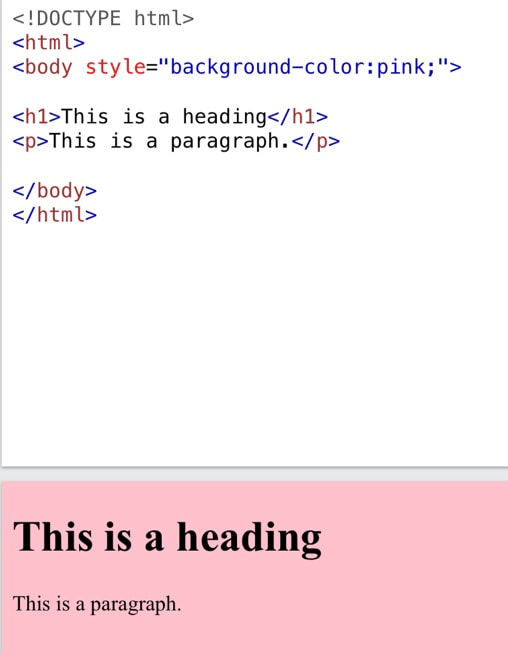
Change the Background Colour
Change your <body> tag by including a style. The following code will make the webpage background green:
<body style="background-color:green;">
Adding an image
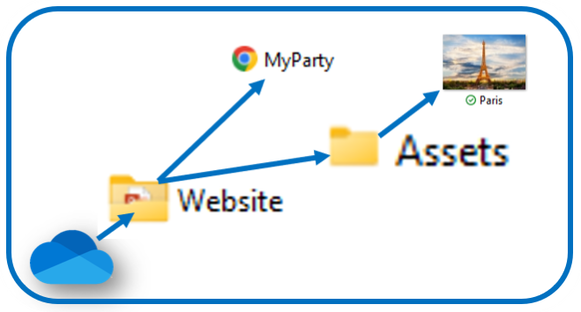
Find images on the internet. Then save them into your Assets folder ( inside your Website folder).
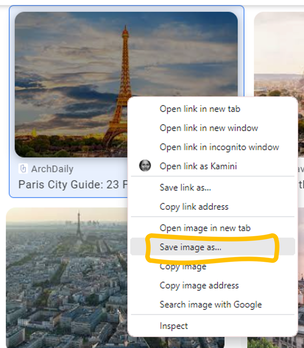
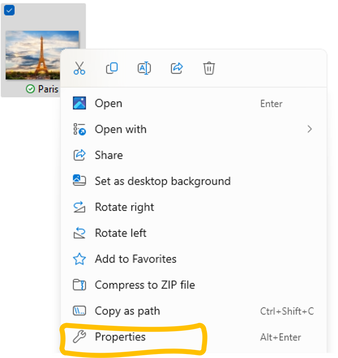
You need to know the full file name for your image.
Right click on the image and select Properties. Check the ending to see if it is a jpg or a png file. For example: the image here is called Paris.jpg.
Type in the following code. Include Assets\ because your image is saved in a sub folder ( folder inside another) called Assets.
<img src="Assets\Paris.jpg" >
Setting its width and height.
Your images often look better if they are all the same size - use the width and height properties to change the size.
<img src="Assets\Paris.jpg" alt="picture of Paris" width="104" height="50">
Alt is used incase your image goes missing. If my image is lost, the text "picture of Paris" will be displayed.
Adding a Link
( also known as a hyperlink reference)
<a href="https://www.w3schools.com">This is a link</a>
Find out more!
Try out more HTML codes using W3Schools.
Helpful hint: you can try out most code first in W3Schools before putting into your webpage. Click the Try it For Yourself buttons.
Helpful hint: you can try out most code first in W3Schools before putting into your webpage. Click the Try it For Yourself buttons.
More on adding an image
Follow these steps:
- Find an image on the internet and save to the same location as your web page. It's best to rename to something simple e.g. BlackCat.jpg.
Troubleshooting: The image won’t show!
- Does it say “google” anywhere in the link? You have copied a web page link. Make sure you keep selecting the image until you find it.
- Does the link have a correct image ending? Check your HTML code. Have you misspelt something? Have you missed adding quotes around the link?
- Is the code perfect and the image link valid? It might be an issue with that image, try a different one.
|

|
|
By now you may have a great website but may want to add a bit of colour. To do this you need to use a style, Styles are special codes that are added into your existing HTML tags.
Click here for a useful list of valid HTML colors.
|
|
Changing the colour of your font.
You can change the color of your font by adding the style tag inside one of your HTML tags.
Changing the background colour
|
You can change the background colour of your whole web page by changing your beginning tag to the following. . Find out more here. Note: you need the American spelling of colour.. color.
|
|
Adding lists
There are two ways to add lists you can have a numbered list or a bullet point list,
All lists use the tag <li> which stands for list item.
Find out more here.
All lists use the tag <li> which stands for list item.
- Numbered lists are organised.
- For example you may want to give a set of instructions.
- Numbered lists use the tag on which stands for ordered list.
- Bullet point lists are used for items which don’t have a particular order.
- For example you may want to give a set of do’s and don’ts.
- Bullet point lists use the tag ul which stands for unordered list,
Find out more here.
Advanced: Tables.. adding structure to your web pages
So far you have been able to add text and images one below the other. What if you want to add an item beside something else as I have on this web page? You’ll need to use table tags. Tables have a beginning and end table tag. Inside you separate the tables into rows, then you separate each row into cells. The best way to do this is to play around with existing code. Find out more here.
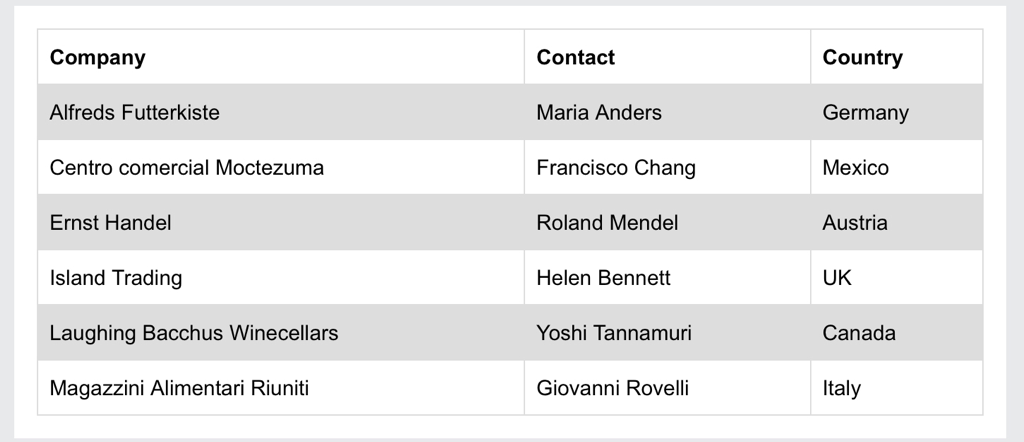
Note: you won’t see your table borders unless you set the border to anything but 1. Find out more about borders here.
Advanced: Forms.. getting information from your user
To add a form is fairly easy. Find out more here, Unfortunately you won’t be able to do too much with the information as you would need to set up a server connection, But they give you some idea of how this work and look great.
Advanced: CSS.. creating style for whole web pages or websites.
CSS can be included with an HTML tag as we have seen. But that only changes the one tag. You can create CSS which affects all tags of a particular type e.g. all paragraphs are blue. To do this you type the style at the top of your page in the head section, Find out more here.
You can also create totally separate files called style sheets. So one style sheet can be linked to many web pages so that they all have the same formatting. Find out more here.
You can also create totally separate files called style sheets. So one style sheet can be linked to many web pages so that they all have the same formatting. Find out more here.
If you want to show off your lovely webpage.